
Automatic Synchronisation runs your directory imports on a schedule, without manual intervention. It reuses the connections configured on the AD Synchronization tab and runs exactly the same import as the manual Synchronize button — keeping OptimiDoc accounts aligned with Active Directory, Azure AD, or Google Directory as people join, move, and leave.
How Automatic Synchronisation Works
OptimiDoc's internal scheduler evaluates the auto-sync schedule at the start of each hour. When the current time matches the configuration, it launches a full synchronisation of all saved directory connections — the same create, update, reactivate, and remove logic described in Active Directory Import. A few points worth knowing:
-
There is no separate list of directories for automatic runs; every connection saved on the AD Synchronization tab is included.
-
In a cluster, the scheduled sync runs on the master node only, so it executes once regardless of how many nodes are online.
-
The schedule is evaluated to the hour, so times are configured as whole hours (for example,
02:00). -
The outcome appears in the Last Import Result card on the User Import page, just like a manual run.
Navigating to Auto Sync
-
In the left sidebar, expand Users and click User Import.
-
Click the Auto Sync tab.
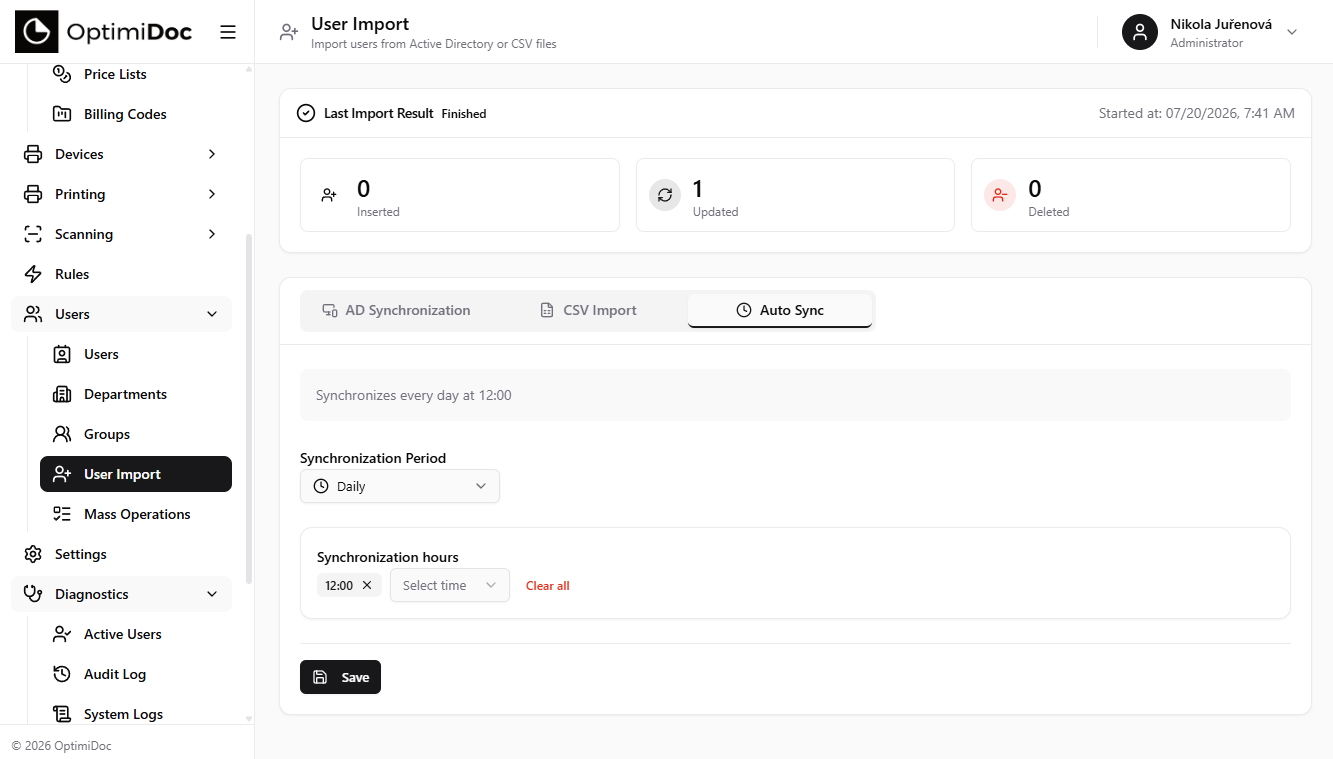
The tab shows a plain-language schedule description at the top, the Synchronization Period selector, and — once a period is chosen — a configuration card with the day and time settings.
Synchronisation Periods
Select the frequency from the Synchronization Period dropdown:
|
Period |
Description |
|---|---|
|
Disabled |
No automatic synchronisation; imports must be triggered manually |
|
Daily |
Runs every day at one or more selected hours |
|
Weekly |
Runs on selected days of the week at a chosen time |
|
Monthly |
Runs on selected days of the month at a chosen time |
Configuring Daily Synchronisation
-
Set the Synchronization Period to Daily.
-
Under Synchronization hours, add one or more hours from the dropdown. Each appears as a badge (for example,
02:00,14:00); click the X on a badge to remove it, or Clear all to remove them all. -
Click Save.
Example: to synchronise twice daily at 02:00 and 14:00, add both hours.

Configuring Weekly Synchronisation
-
Set the Synchronization Period to Weekly.
-
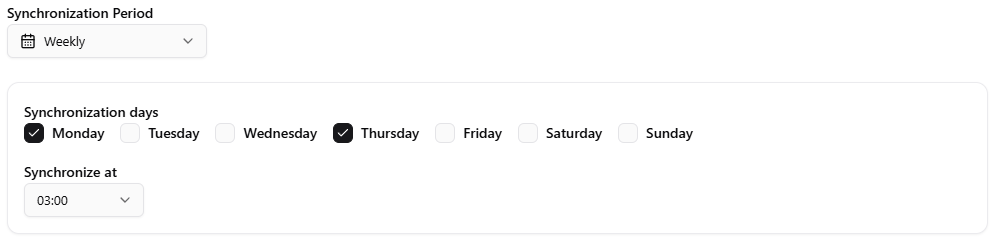
Under Synchronization days, tick the days of the week (Monday to Sunday).
-
Set the Synchronize at time using the hour dropdown (a single time applies to all selected days).
-
Click Save.
Example: to synchronise every Monday and Thursday at 03:00, tick Monday and Thursday and set the time to 03:00.
Configuring Monthly Synchronisation
-
Set the Synchronization Period to Monthly.
-
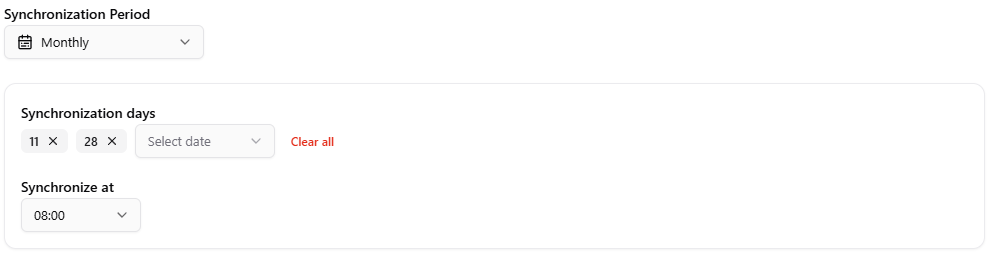
Under Synchronization days, add one or more days of the month from the dropdown. Each appears as a badge; use the X or Clear all to remove.
-
Set the Synchronize at time.
-
Click Save.
Note: Days are limited to 1–28 so that a run always falls on a valid date in every month, February included.
Understanding the Schedule Description
The panel at the top of the tab restates the current configuration in plain language, so you can confirm it at a glance:
|
Configuration |
Description shown |
|---|---|
|
Disabled |
Automatic synchronization is disabled |
|
Daily at 02:00 and 14:00 |
Synchronizes every day at 02:00, 14:00 |
|
Weekly on Monday, Thursday at 03:00 |
Synchronizes on Monday, Thursday at 03:00 |
|
Monthly on the 1st and 15th at 00:00 |
Synchronizes on day(s) 1, 15 at 00:00 |
Best Practices
|
Practice |
Rationale |
|---|---|
|
Schedule during off-peak hours |
Reduces load on the directory server and OptimiDoc during business hours |
|
Use daily sync for dynamic environments |
New starters and leavers are reflected promptly |
|
Use weekly or monthly sync for stable environments |
Avoids unnecessary processing when the directory rarely changes |
|
Configure and test a connection first |
Automatic synchronisation needs at least one working connection on the AD Synchronization tab — run it manually once to confirm it works |
|
Review the Last Import Result periodically |
Confirm that scheduled runs are completing without errors |
In Summary
-
Automatic Synchronisation runs the saved directory connections on a Daily, Weekly, or Monthly schedule.
-
It performs the same import as a manual run and reports to the same Last Import Result card.
-
In a cluster it runs on the master node only; times are configured as whole hours.
Related articles