
Active Directory Import synchronises user accounts from one or more directory services into OptimiDoc. It supports on-premises LDAP and Active Directory, Open LDAP, Lotus Domino, Azure AD (Entra ID), and Google Directory, with configurable attribute mapping, group replication, and advanced filtering. Each connection can search several directory paths, and a single OptimiDoc server can hold up to ten connections side by side.
How Active Directory Import Works
A synchronisation run processes each configured connection in turn:
-
Connect and search. OptimiDoc binds to the directory using the connection's credentials and searches every configured Directory path (search base) for enabled user accounts, combining the results.
-
Map attributes. For each account, standard fields (login, given name, surname, e-mail, home folder) are read directly, and the attributes you nominate (department, card, PIN, alias, external ID, default billing code) are read from the mapped directory attributes.
-
Match existing users. Each directory account carries a stable identifier (its objectGUID). OptimiDoc matches on this GUID, so accounts are recognised again even if their login or name changes.
-
Create, update, or reactivate. New accounts are created; existing ones are updated where fields have changed; and an account that had been deleted in OptimiDoc is reactivated if it reappears in the directory.
-
Replicate groups and departments. Departments and billing codes referenced by imported users are created automatically if missing. Group memberships are mirrored for the groups you list under Groups for replication — each becomes a matching OptimiDoc group (shown read-only, since directory synchronisation owns its membership).
-
Remove departed users. Because directory sources are authoritative, accounts previously imported from a connection that are no longer present in the directory are removed at the end of the run. (CSV import does not do this.)
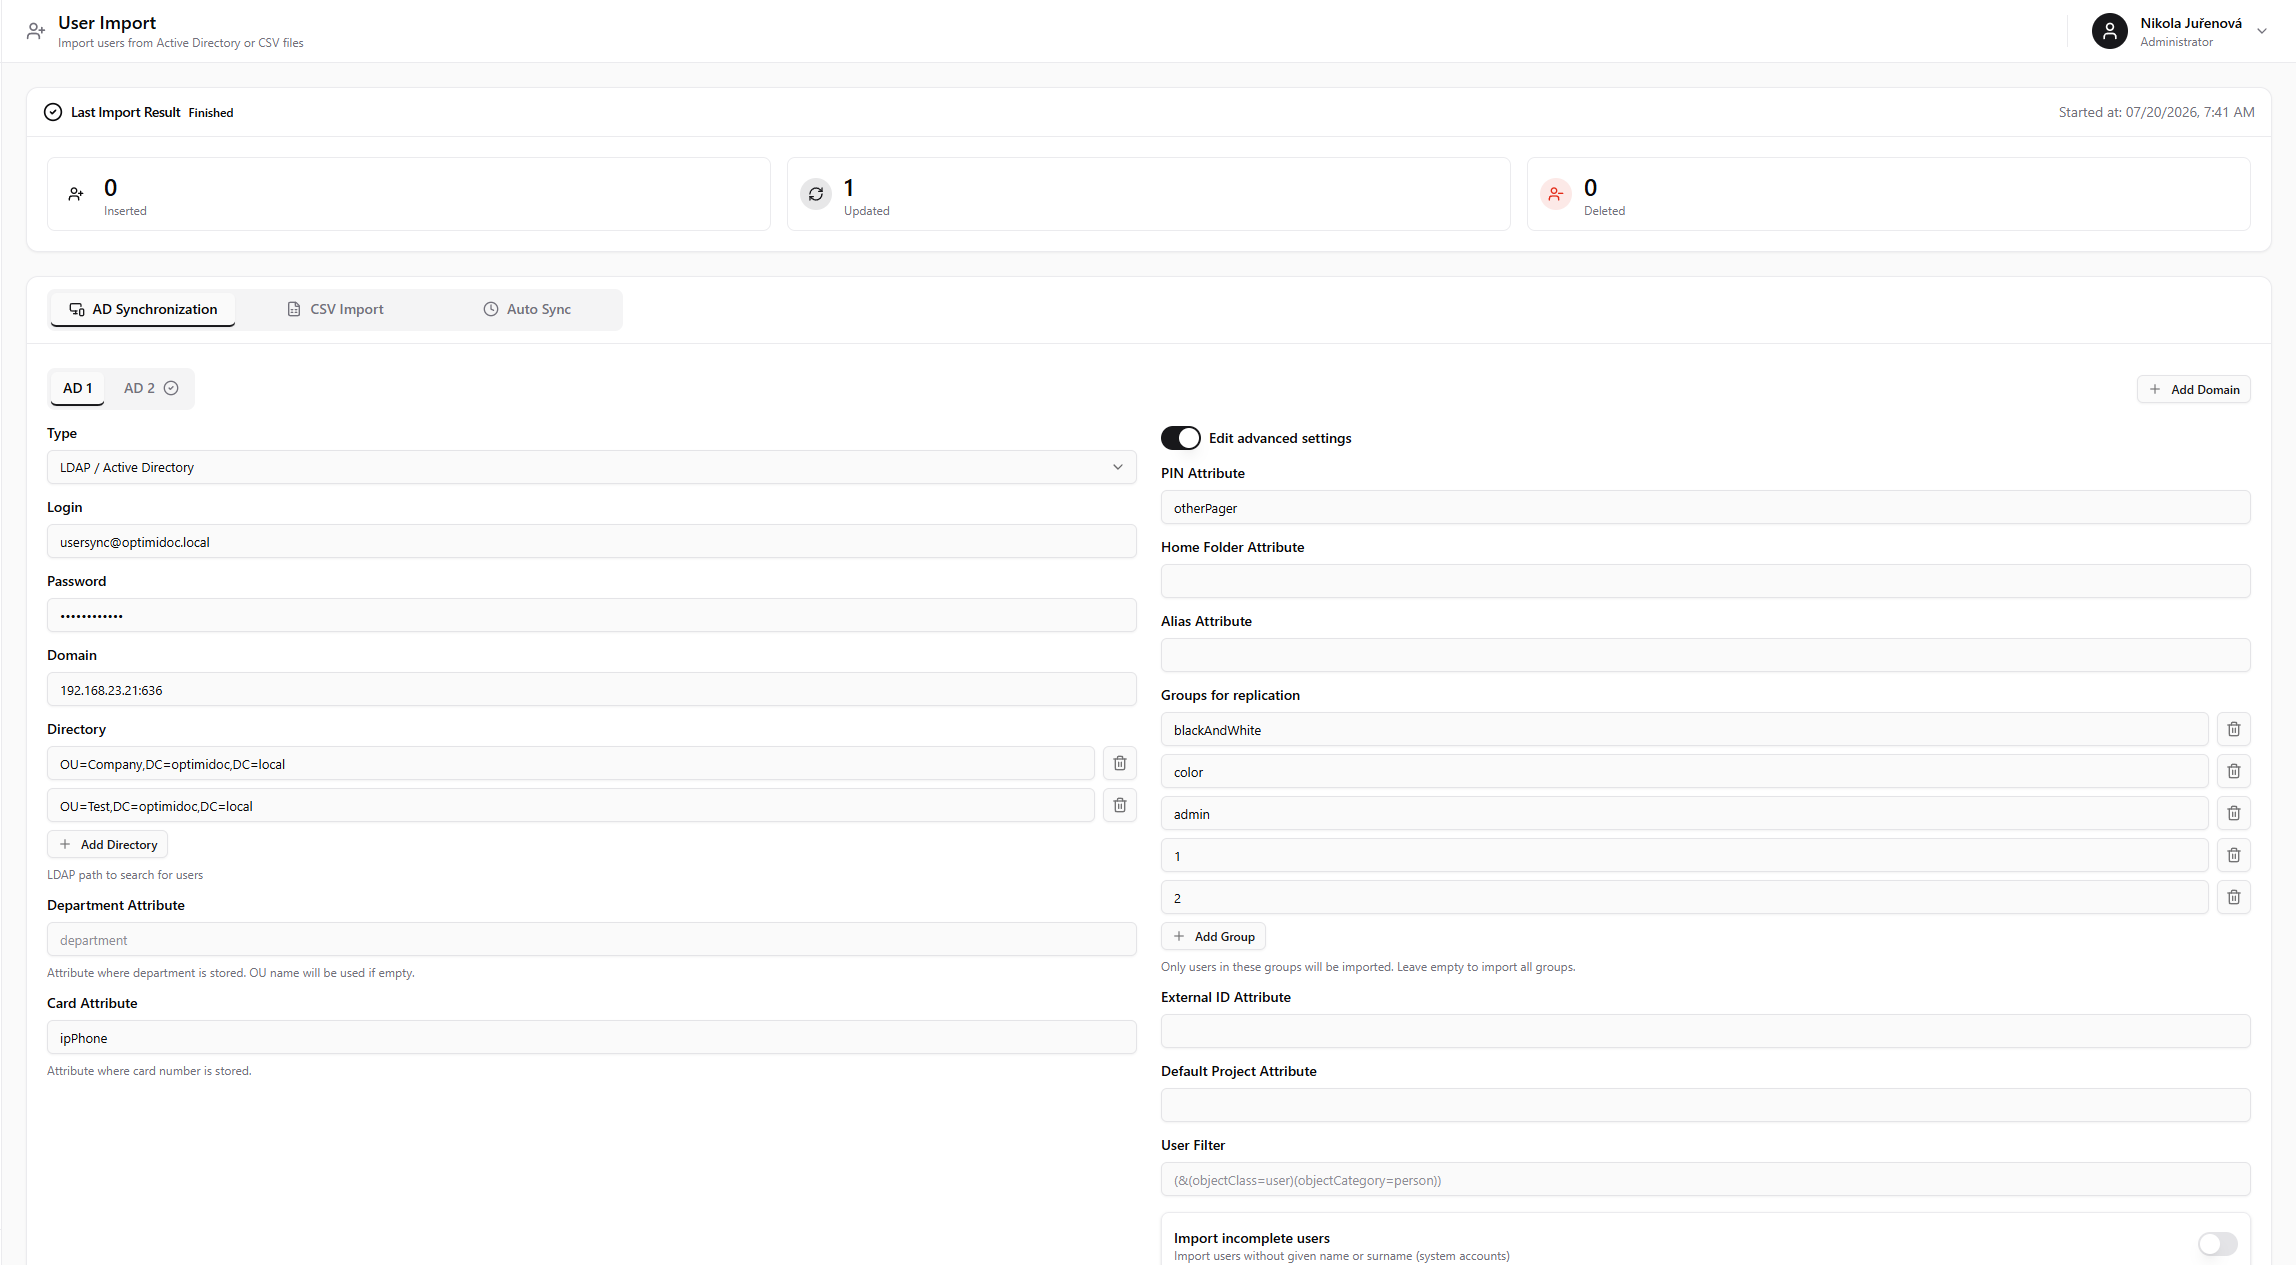
The result of the most recent run — inserted, updated, and deleted counts — is shown in the Last Import Result card.
Navigating to AD Import
-
In the left sidebar, expand Users and click User Import.
-
The AD Synchronization tab opens by default. It shows the Last Import Result card at the top and the connection editor below.
Configuring a Directory Connection
Each connection is a numbered tab (AD 1, AD 2, …). Configure the following.
Connection Type
Select the Type from the dropdown:
|
Type |
Description |
|---|---|
|
LDAP / Active Directory |
On-premises Active Directory or a standard LDAP server |
|
Open LDAP |
An OpenLDAP directory server |
|
Lotus Domino |
An IBM/HCL Domino directory |
|
Azure AD / Entra ID |
Microsoft cloud directory (OAuth authentication) |
|
Google Directory |
Google Workspace directory (OAuth authentication) |
Basic Settings
|
Field |
Description |
|---|---|
|
Login / Client ID |
The bind account for LDAP directories, or the OAuth Client ID for Azure AD and Google Directory |
|
Password / Client Secret |
The bind password, or the OAuth Client Secret |
|
Domain |
The directory domain (for example, |
|
Directory |
The LDAP search base, such as |
|
Department Attribute |
The directory attribute holding the user's department. If left empty, the user's Organisational Unit (OU) name is used as the department. |
|
Card Attribute |
The attribute holding the user's card number for MFP authentication |
OAuth Authorisation (Azure AD and Google Directory)
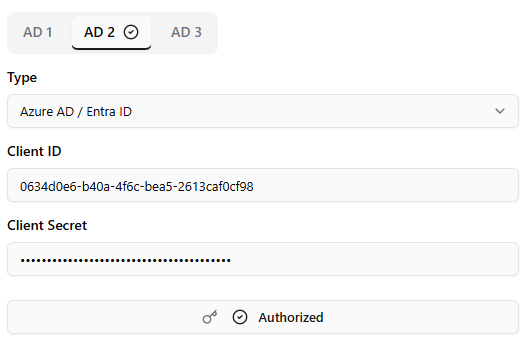
Cloud directories authenticate with OAuth rather than a bind password:
-
Enter the Client ID and Client Secret.
-
Click the authorisation button. It reads Unauthorized (red) until consent is granted.
-
A popup opens the provider's consent flow; sign in with an administrator account and grant the requested permissions.
-
Once complete, the button reads Authorized, and the connection's tab shows a tick.
Advanced Settings
Turn on the Edit advanced settings switch to reveal the mapping and filtering options:
|
Field |
Description |
|---|---|
|
PIN Attribute |
Attribute holding the user's PIN |
|
Home Folder Attribute |
Attribute holding the home folder path (LDAP directories only) |
|
Alias Attribute |
Attribute whose values are imported as additional login aliases |
|
Groups for replication |
The directory group names to mirror into OptimiDoc (see below). Click Add Group to list several. |
|
External ID Attribute |
Attribute used as the account's external system identifier |
|
Default Project Attribute |
Attribute holding the user's default billing code |
|
User Filter |
An LDAP filter expression restricting which accounts are imported (for example, |
|
Import incomplete users |
Import accounts that lack a given name or surname (typically service accounts). Off by default; LDAP directories only. |
|
Import duplicate users |
Create accounts even when a credential (login, card, PIN) already exists; conflicting values are skipped rather than failing the whole account. Off by default. |
Groups for Replication
List the directory group names whose membership you want reflected in OptimiDoc. During a run, each user's membership in those groups is mirrored to a matching OptimiDoc group, which is created automatically the first time it is seen and thereafter shown read-only. This is how directory groups drive OptimiDoc permissions without manual group assignment. Leave the list empty to import users without replicating any group membership.
Managing Multiple Connections
-
Click Add Domain to add another connection. Up to ten connections can be configured; each occupies its own AD tab.
-
To remove a connection, open its tab and click Remove AD. A confirmation dialog appears — "Are you sure you want to remove this AD configuration? The change will take effect after you save." — and the removal is applied when you next save. The first connection cannot be removed.
Running a Synchronisation
-
Configure the connection(s).
-
Click Synchronize.
-
The Last Import Result card shows a live progress bar and status messages while the run proceeds. When it finishes, the card reports:
|
Statistic |
Description |
|---|---|
|
Inserted |
New accounts created |
|
Updated |
Existing accounts updated |
|
Deleted |
Accounts removed because they were no longer present in the directory |
If a connection fails, the status shows Error with a message, and the run continues with the remaining connections.

Saving Without Synchronising
Click Save to persist the configuration without running an import. Saved connections are reused by the next manual run and by Automatic Synchronisation.
In Summary
-
One connection can search several Directory paths; a server can hold up to ten connections.
-
Accounts are matched by objectGUID, so renames are handled cleanly.
-
Departments, billing codes, and replicated groups are created automatically.
-
Directory sources remove accounts that disappear from the directory; run imports on a schedule with Automatic Synchronisation.
Related articles