
Mass User Operations provides two bulk tools that save time when managing many accounts at once: a PIN Generator that creates and e-mails PIN codes to a selected population of users, and a Data Import that assigns cards, PINs, or login aliases to existing users from a file. Both are reached from Users > Mass Operations.
PIN Generator
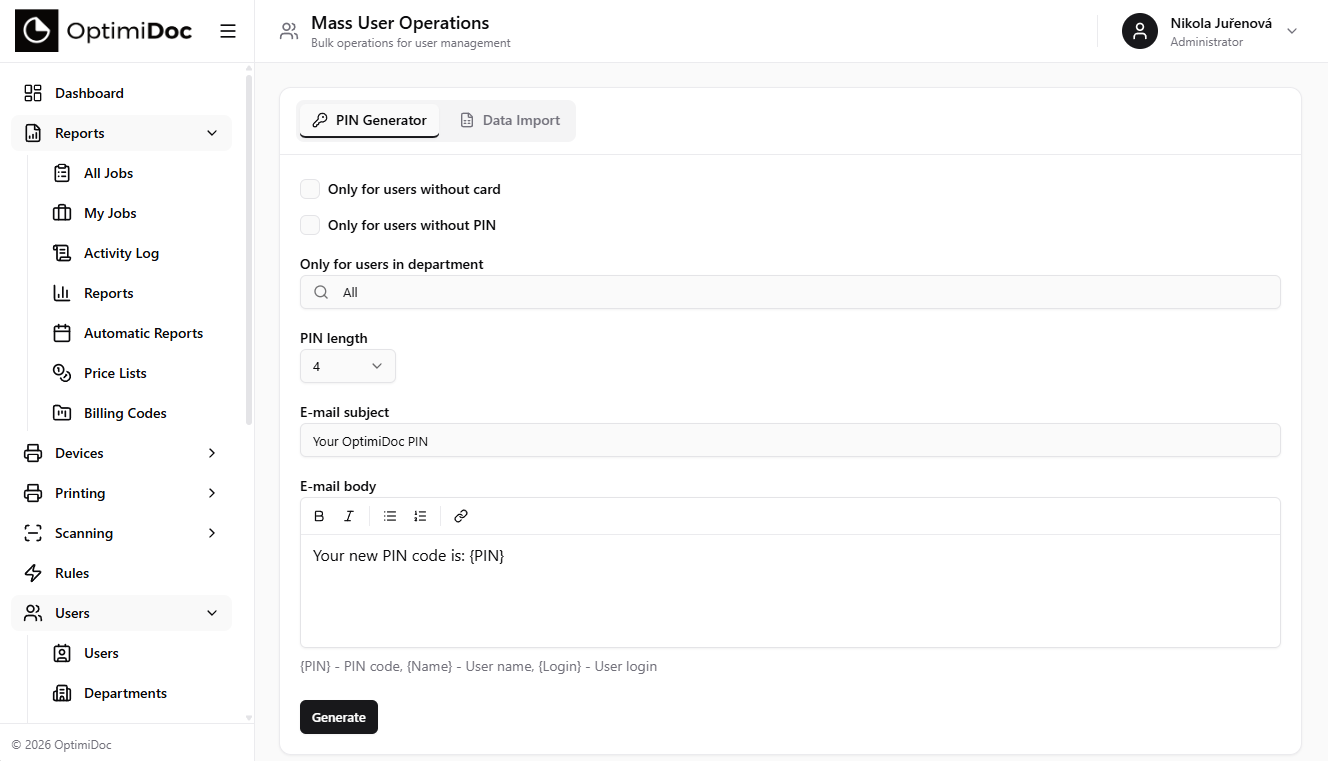
The PIN Generator tab creates a fresh PIN for each user in a target population and e-mails it to them — ideal for rolling out PIN-based device authentication to a whole department or to everyone who does not yet have a PIN.
Options
|
Option |
Description |
|---|---|
|
Only for users without card |
Limit generation to users who have no card registered |
|
Only for users without PIN |
Limit generation to users who do not yet have a PIN (so existing PINs are left untouched) |
|
Only for users in department |
Restrict generation to a single department. Start typing to search; leave empty to target all users. |
|
PIN length |
The number of digits in each generated PIN — 4, 5, 6, or 8 |
|
E-mail subject |
Subject line of the message sent to each user (default: Your OptimiDoc PIN) |
|
E-mail body |
The message body, edited in a rich-text editor and sent as HTML (default: Your new PIN code is: {PIN}) |
E-mail Placeholders
The subject and body may contain placeholders that are substituted per recipient:
|
Placeholder |
Replaced with |
|---|---|
|
|
The generated PIN code |
|
|
The user's name |
|
|
The user's login |
Click Generate to run. A confirmation reports how many PINs were generated.
Security: PINs are created with a cryptographically secure random generator and are never written to the application logs. Each code is delivered only in the e-mail to its owner, so administrators never see or handle the values directly.
Data Import
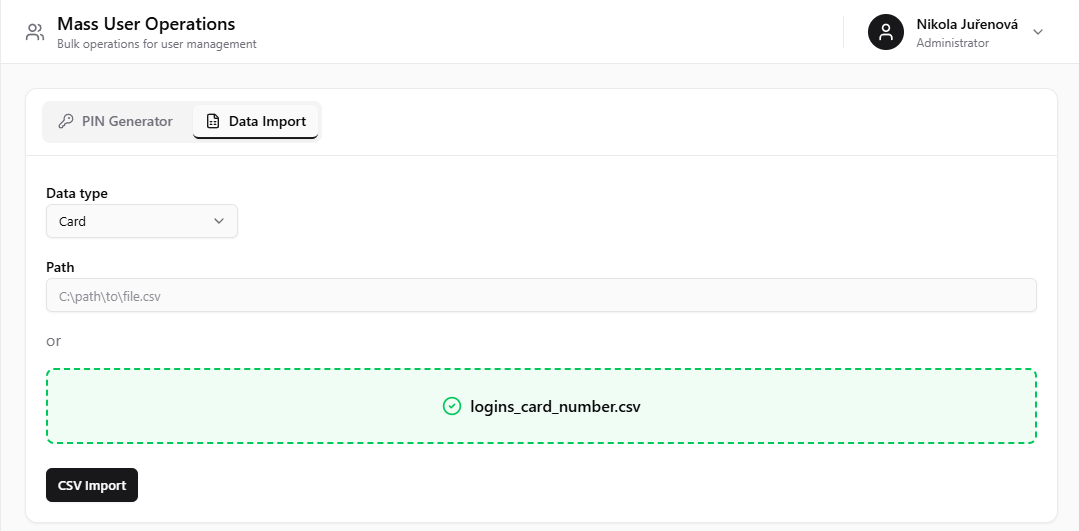
The Data Import tab bulk-assigns a single credential type to existing users from a CSV file — for example, importing card numbers exported from a badge system, or loading PINs or login aliases in bulk.
Steps
-
Choose the Data type to import: Card, PIN, or Alias (an additional login).
-
Provide the file in one of two ways — they are mutually exclusive:
-
Enter a server-side Path to a CSV file (for example,
C:\path\to\file.csv), or -
Drag and drop a
.csvfile onto the upload area, or click it to browse. Only CSV files are accepted. -
CSV format is as follows:
-
login1,PIN or Card_number or alias
login2,PIN or Card_number or alias
login3,PIN or Card_number or alias
.
.
.
loginx,PIN or Card_number or alias
-
Click CSV Import.
Results
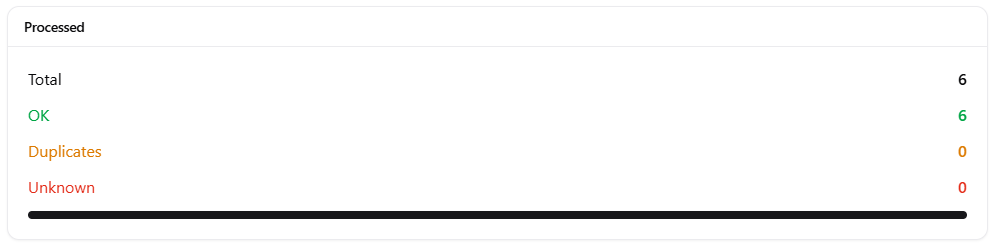
When the import finishes, a Processed summary reports what happened, with a progress bar showing the success rate:
|
Figure |
Meaning |
|---|---|
|
Total |
Rows read from the file |
|
OK |
Rows applied successfully to a matching user |
|
Duplicates |
Values that already existed and were skipped |
|
Unknown |
Rows that could not be matched to a user |
Bulk Deletion on List Pages
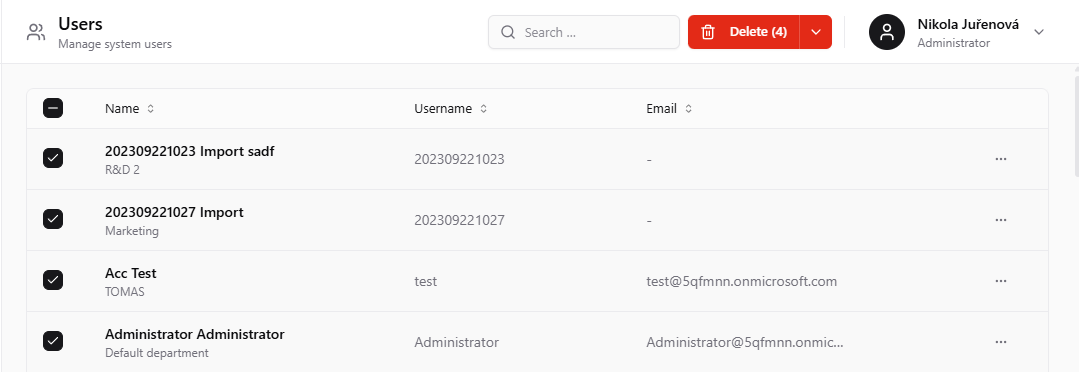
Bulk deletion is handled directly on the list pages rather than here. On the Users, Groups, and Departments pages, tick the row checkboxes (or the header checkbox to select the whole page); a Delete button showing the selection count then appears in the page header. The built-in administrator and the system Everyone group cannot be selected, and departments that still contain users cannot be deleted.
In Summary
-
Use the PIN Generator to create and e-mail PINs to a target population; PINs are generated securely and never logged.
-
Use Data Import to bulk-assign cards, PINs, or aliases to existing users from a CSV.
-
Bulk deletion lives on the Users, Groups, and Departments list pages.
Related articles