
The OptimiDoc dashboard is fully customisable — each user can choose which widgets to display, resize and rearrange them on a grid, and switch between a four- or six-column layout to build a personalised overview of the system.
How Widget Configuration Works
Your dashboard layout is stored per user in your browser's local storage, so each administrator or user sees their own arrangement and changes never affect anyone else. The layout persists across sessions on the same browser; signing in from a different browser or machine starts from the role-based default until you customise it there too.
New accounts begin from a role-based default layout — administrators land on system-monitoring widgets, regular users on self-service widgets (see Dashboard). From there, two controls in the dashboard header let you tailor everything:
-
Dashboard Settings — choose which widgets are visible and how many columns the grid uses.
-
Rearrange Widgets — enter edit mode to move, resize and remove widgets directly on the grid.
Showing and Hiding Widgets
-
Open the Dashboard.
-
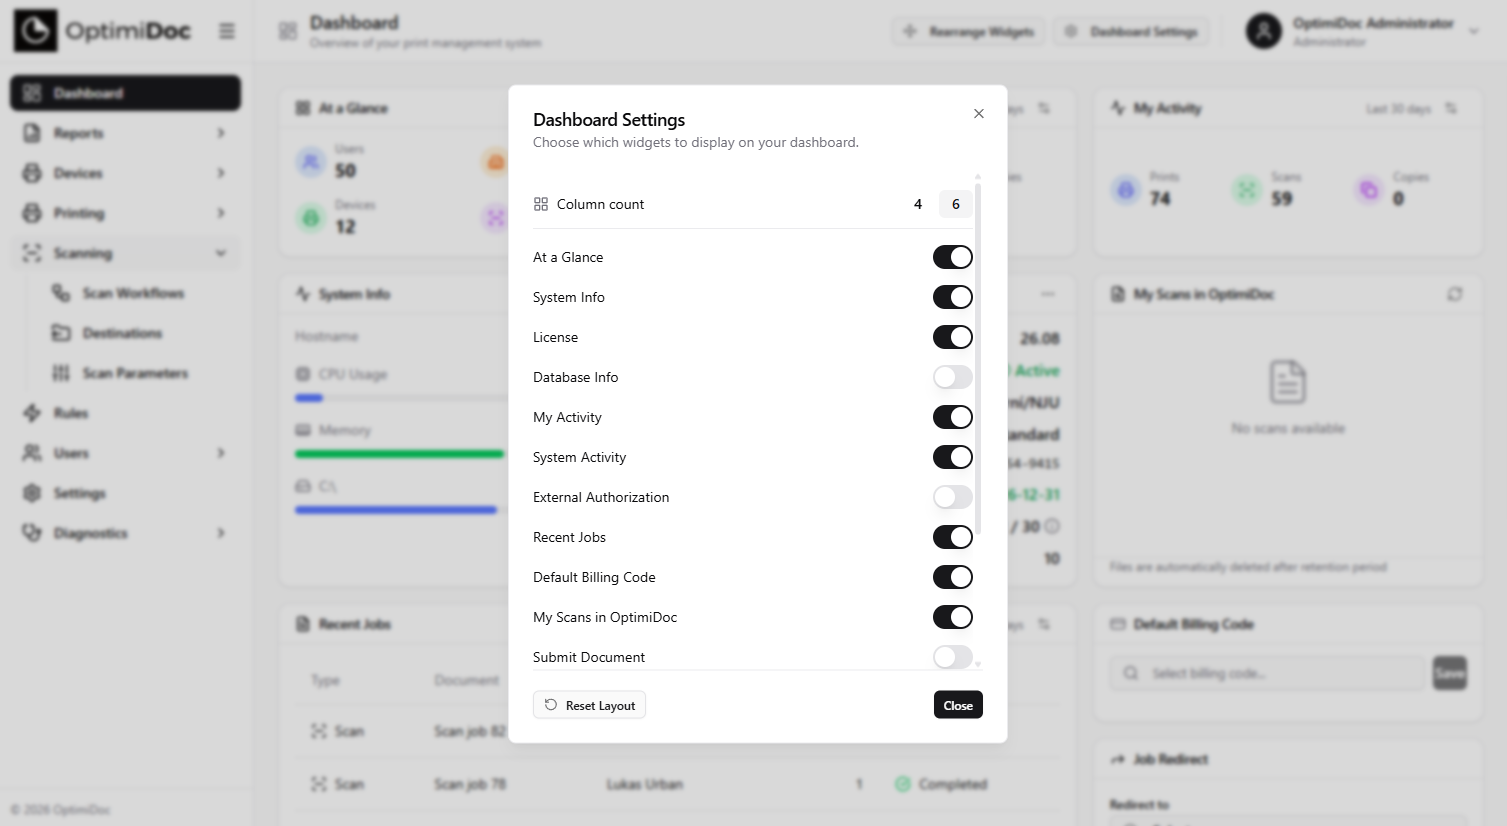
Click Dashboard Settings in the top-right of the page header.
-
In the dialog, use the switch beside each widget to show or hide it. Enabling a widget places it in the first free slot and scrolls the page to it.
-
Click Close when finished.
The list only offers the widgets that apply to you: administrator-only widgets (At a Glance, System Info, License, Database Info, System Activity) are hidden from regular users, and feature-dependent widgets (Default Billing Code, My Quota) appear only when Billing Codes or Quotas are enabled.
Rearranging and Resizing Widgets
Moving and resizing happen in a dedicated edit mode so you don't disturb the layout by accident:
-
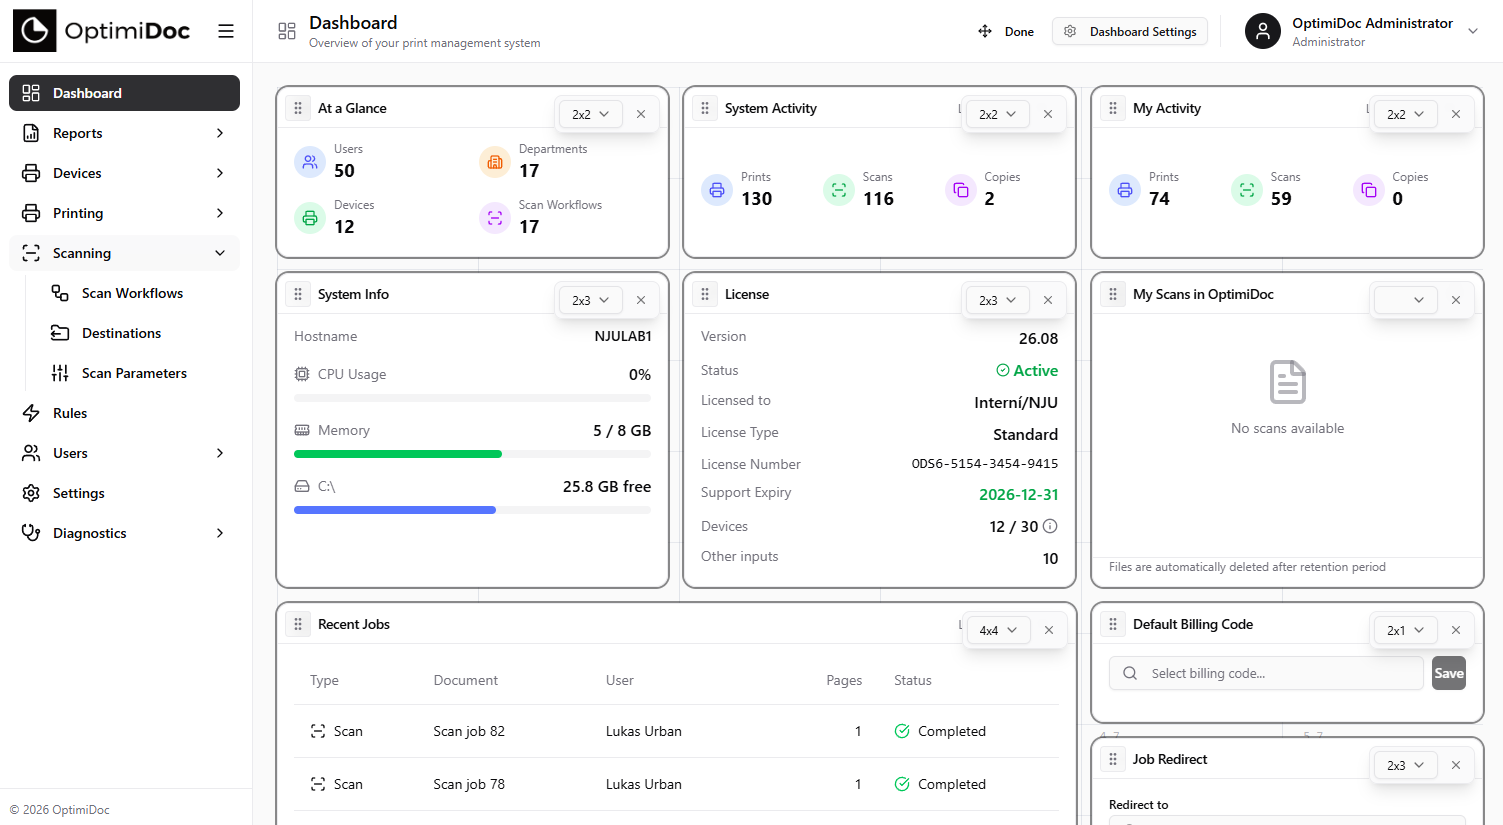
Click Rearrange Widgets in the page header. The button switches to Done and a grid overlay appears behind the widgets.
-
Move a widget by dragging its grip handle (top-left corner). Widgets snap to the nearest free grid cell, and any widgets they would overlap automatically reflow out of the way.
-
Resize a widget using the size dropdown in its top-right corner — each widget offers a small set of preset sizes (for example
2×2,4×4or6×4). -
Remove a widget with the × button next to the size dropdown. Removed widgets can be switched back on at any time from Dashboard Settings.
-
Click Done to leave edit mode. Your changes are saved automatically.
Choosing the Grid Width
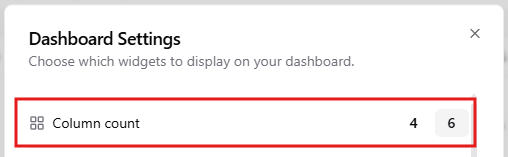
The dashboard grid can be four or six columns wide. Open Dashboard Settings and use the Column count toggle to switch between them. A six-column grid gives finer control over widget placement and suits wider screens; four columns produces a simpler, denser layout on smaller displays.
Resetting to Defaults
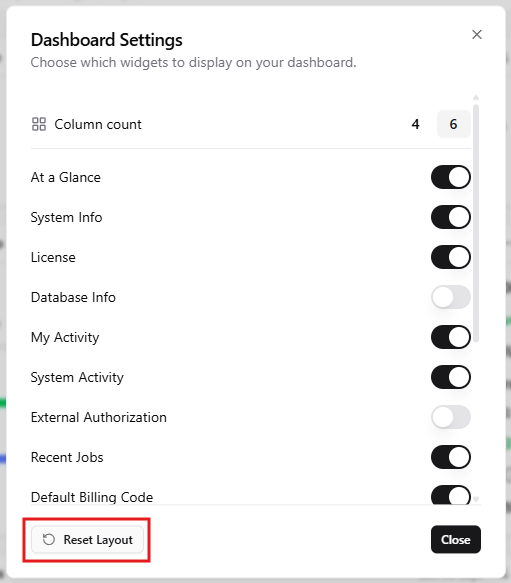
To discard your customisations and return to the default layout for your role, open Dashboard Settings and click Reset Layout. This restores the default set of widgets, sizes and positions for an administrator or regular user respectively.
In Summary
Customising the dashboard comes down to two controls: Dashboard Settings to decide which widgets appear and how wide the grid is, and Rearrange Widgets to decide where they sit and how big they are. Because everything is saved per user in the browser, you can shape the dashboard around your own workflow and reset it whenever you like. For what each widget does, see the Dashboard Widget Reference.
Related Articles
-
Dashboard Widget Reference — detailed description of every widget
-
Dashboard — dashboard overview
-
First Login and Navigation — navigating the OptimiDoc interface