
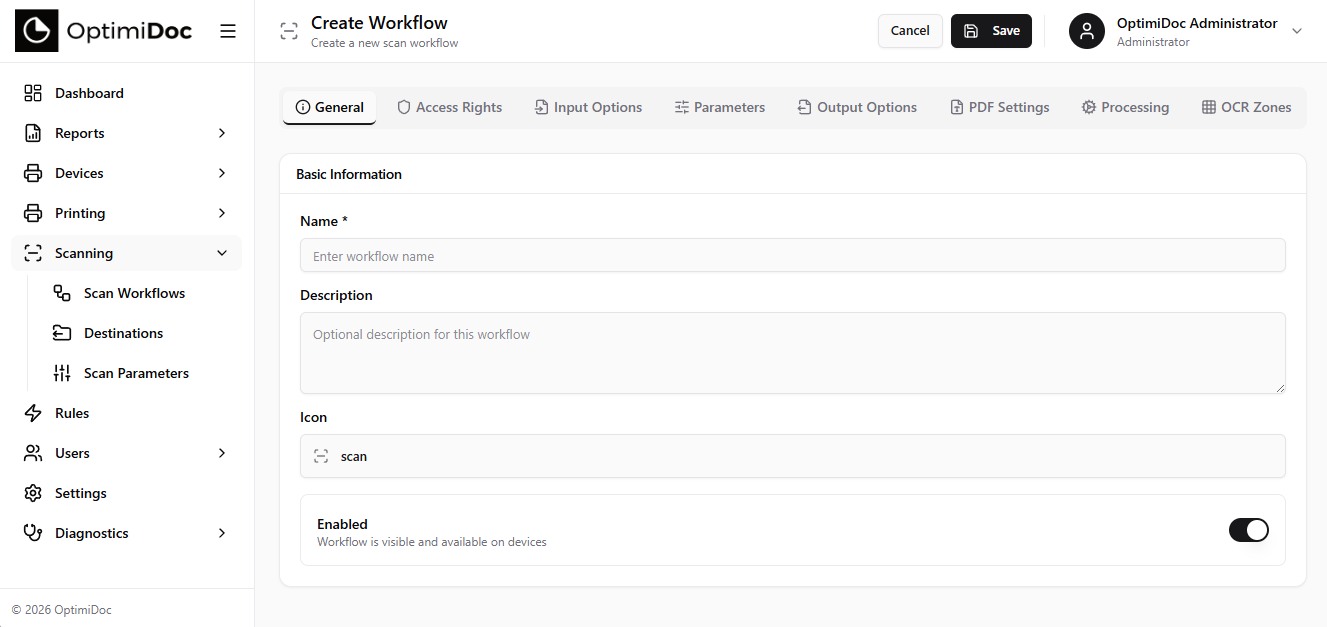
The General tab defines the core identity of a scan workflow — its name, description, panel icon and whether it is enabled for use. These settings determine how the workflow appears to users on the device panel and in the web and mobile clients, and control its availability across the organisation.
How It Works
Every scan workflow opens on the General tab, where its Basic Information is defined. Nothing here changes how a document is processed — instead these settings control how the workflow is presented and whether users can see it. A clear name and a recognisable icon make it far easier for someone standing at an MFP to pick the right workflow, so it is worth treating this tab as the workflow's "shop window".
Configuration Fields
Name
The Name is the primary identifier for the workflow. It appears on device panels, in the web client workflow list, and in administrative reports.
-
The name is required and should be unique so users and administrators can tell workflows apart.
-
Keep it concise and descriptive (for example "Invoice Scan", "HR Documents", "Contract Archive").
-
Because it is shown on the MFP touch panel, shorter names read better on smaller screens.
Description
The optional Description adds context about the workflow's purpose. It is visible to administrators in the workflow list and helps colleagues understand when to choose a particular workflow.
-
Recommended for organisations that maintain many workflows.
-
Use it to note the intended department, document type or downstream process.
Icon
Each workflow can be given a visual Icon that appears next to its name on the MFP panel. OptimiDoc ships a built-in icon library, and you can also upload your own.
-
Click the icon selector to open the gallery.
-
Browse the grid and click an icon to select it — the preview updates immediately.
-
To use your own artwork, click Upload Custom Icon and choose a PNG file.
Icons are provided in light and dark variants (dark icons are shown on a light backdrop and light icons on a dark backdrop) so they stay visible whatever colour scheme the device panel uses. To revert a workflow to a standard icon, simply reopen the gallery and pick one of the built-in icons.
Enabled
The Enabled toggle controls whether the workflow is active.
-
When enabled, the workflow appears on device panels and in client applications for authorised users.
-
When disabled, it is hidden from all users but its configuration is fully preserved.
-
Use the toggle to retire a workflow temporarily without deleting it. The same toggle is also available directly in the workflow list, so you can enable or disable without opening the editor.
How to Configure the General Tab
-
Go to Scanning > Scan Workflows in the web administration.
-
Click Create Workflow to add a new workflow, or click an existing workflow to edit it.
-
The General tab is shown first.
-
Enter a Name and, optionally, a Description.
-
Click the icon selector and choose an icon, or upload a custom PNG.
-
Set the Enabled toggle as required.
-
Move through the remaining tabs and click Save to store the whole workflow.
The panel display order is not set here — it is controlled from the workflow list using Reorder (drag-and-drop). See Scan Workflows Overview.
Best Practices
-
Adopt a consistent naming convention, such as a department prefix ("Finance - Invoices", "HR - Applications").
-
Choose icons that visually represent the document type so users can identify the right workflow at a glance.
-
Disable rather than delete workflows that are temporarily out of use — this keeps the full configuration for later.
Related articles